Last Minute Halloween DIYs // Cards, Boxes & more!
October 29, 2015
Aren't you sad that the Halloween themed posts are almost done?! :( I am! Although Halloween isn't my favorite holiday, I still love to be festive! Today I'm bringing you some quick and easy Halloween DIYs for your party, home, or just for your friends.
Our first project is a quick and easy party decor printable that will make all of your friends think you put a lot of work in (when you really didn't)! I'm a huge fan of canva.com and when I logged in the other day they had soooo many cute graphics for Halloween! You're more than willing to use one of their free pre-made designs or you can customize your own just as easily. For those of you who may not know, Canva is a website (comparable to PicMonkey) where you can use graphics and texts to design your own pieces for social media, personal use, or whatever you can dream of! There are options that cost money though, so just pay attention and stick to the free ones ;).
Here's what I made using canva. You'll see these sort of labels in stores for up to $6! Making your own funny warning labels of vampire fangs, bat wings, and more to match what you're serving at your party.
The next project I want to share with you is this trio of 3" x 3" cutesy Halloween cards. These would be perfect on a cute little Halloween treat for a co-worker or a friend, whatever you're giving, add this cute and easy card to put it over the top!
My favorite part of this entire project was finally being able to get to use my Tim Holtz Tiny Attacher (eek!)! To start off this adorable trio you'll want some Halloween paper and stamps! Mine feature some kraft cardstock, DCWV Bewitched stack, some foam adhesive, and some washi tape for extra flare.
In order to make a 3x3 card you'll need to cut your cardstock to 3" x 6" then fold it in half. After you have your base ready, your creative opportunities are endless. I used a combo of stamps and paper to create some backgrounds and focal points. I used foam adhesive to accent the little pieces I cut out of the paper that said cute things. This is the perfect way to use those weird papers with all the block pieces!
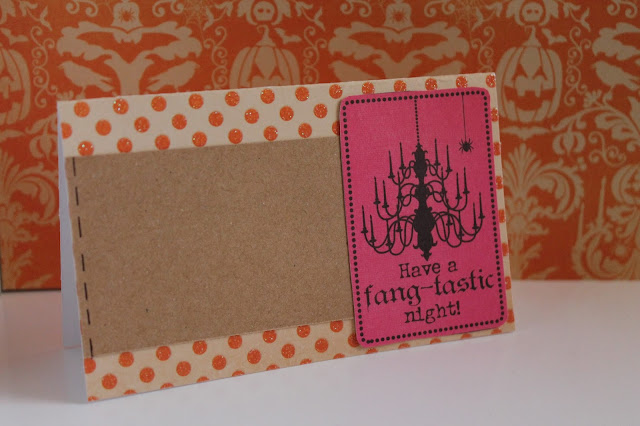
Next, along the same lines as the cards, I've made some easy DIY place cards for your Halloween dinner party. Wouldn't a murder mystery party on Halloween be so much fun?! I've always wanted to do one.
You can make these as big or as small as you want. I'm actually using mine for place cards for the different types of food. I added stitching details with a marker (make sure you're using a ruler to keep your line straight!).
Last, but certainly not least, I'm sharing with you two different party favor box ideas! They both have the same base, but they are slight variations depending on what you're using them for.
My first tip is to use double sided paper, but also make sure it doesn't have a certain orientation (like portrait or landscape because it's easy to mess it up) this will give the inside of your favor box a little pop without doing any more work!
For the kids, I created a really cute vampire gift box idea! Using this tutorial I made the black box, then added my own little twist. I measured the box and cut out a 1/4" inch strip the width I needed. Then, I cut out jagged teeth for my little vampire. Attaching the googly eyes is the final step (for a more silly look, choose two different sized eyes)!
My alternative box features some cute stamps that I really wanted to use. I stamped them then fussy cut them out and attached them with foam adhesive to the lid of the box. I added a little bit of bling for another dimension of texture.
Thank you so much for stopping by! I hope you enjoyed these last minute ideas (and you put them to good use!)!


1 comments
Yay Will definitely check out !
ReplyDeleteThanks for leaving a comment! I appreciate all feedback, suggestions, questions, and comments! Don't forget that you can find me on Instagram and Facebook to get more immediate feedback!
______________________________________
Compliance with the new European Union E-Privacy Regulation:
If you leave a comment on this blog, you do so with the knowledge that your name and blog link are visible to all who visit this blog, that you have published your own personal details and that you have consented for your personal information to be displayed.
This blog is currently made in the USA.